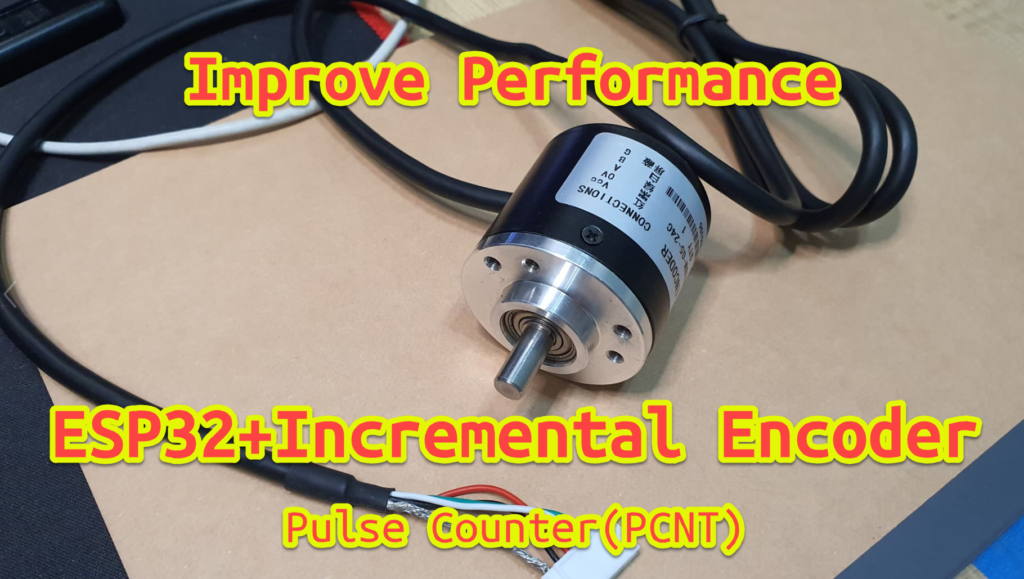
Incremental Encoder
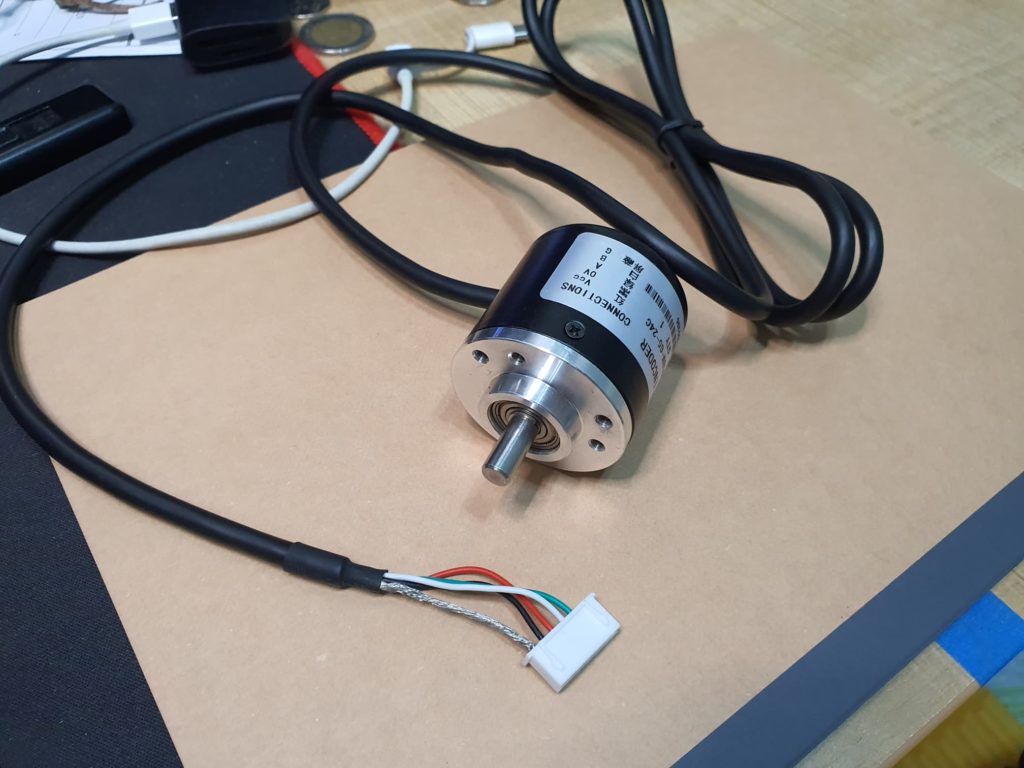
Incremental Encoder ส่วนใหญ่จะเป็นเซนเซอร์ที่ใช้สำหรับวัดระยะการเคลื่อนที่ เชิงมุม โดยความละเอียดในการอ่านค่าขึ้นอยู่กับจำนวน Pulse Per Revolution (PPR) ยิ่งค่ามากความละเอียดในการอ่านค่ามุมก็จะมากขึ้นตามไปด้วย ตัว Incremental Encoder 2 สัญญาณ Output ที่แสดงอยู่ในรูปด้านบนมีค่าความละเอียดอยู่ที่ 400 PPR หมายถึงเมื่อ Encoder หมุน 1 รอบจะสร้าง Pulse output จำนวน 400 ครั้ง / ช่องสัญญาณ
Output ของ Incremental Encoder อาจจะมี 1, 2 หรือ 3 ช่องสัญญาณก็ได้ ถ้า
มี 1 สัญญาณ Output (A) จะทำให้เราทราบระยะที่ Encoder หมุน แต่ไม่รู้ทิศทางของการหมุน
มี 2 สัญญาณ Output (A, B)จะทำให้เราทราบระยะที่ Encoder หมุน และทราบทิศทางของการหมุน
มี 3 สัญญาณ Output (A, B, Z(index))จะทำให้เราทราบระยะที่ Encoder หมุน, ทราบทิศทางของการหมุน, และทราบ Absolute angle ด้วย
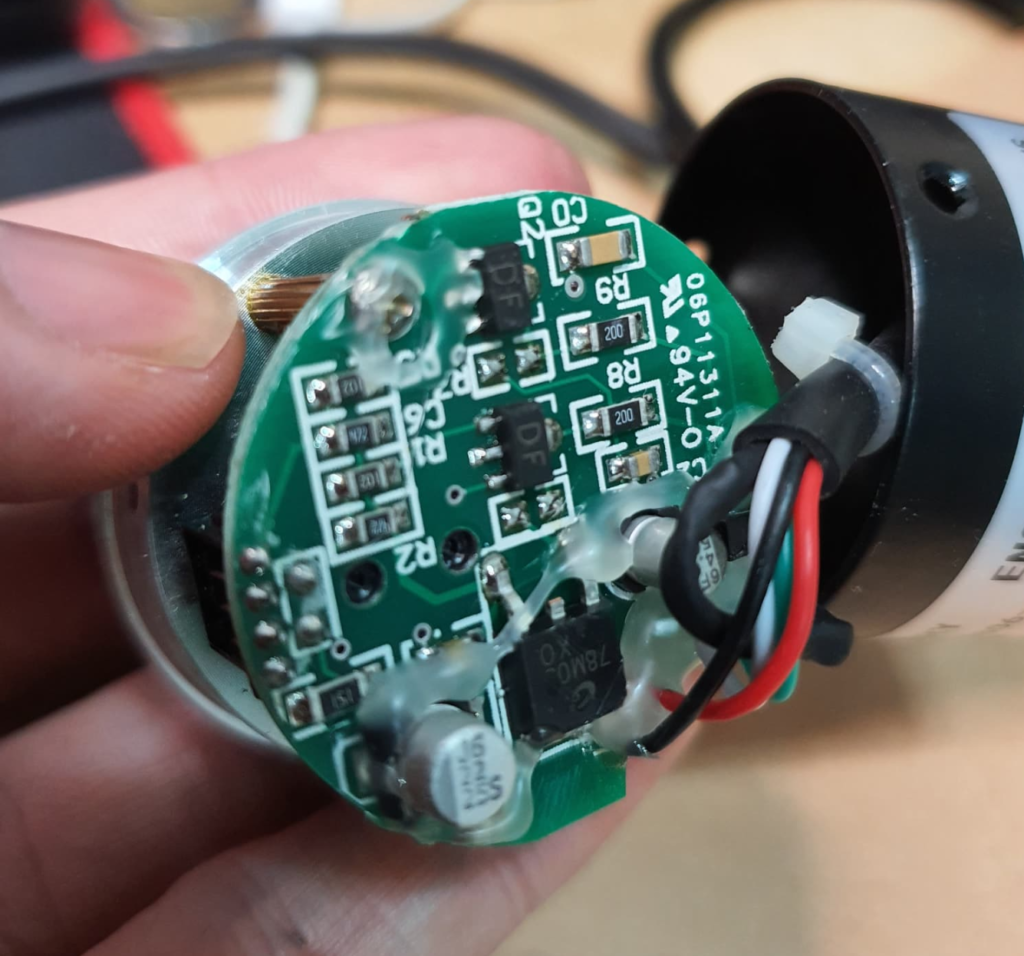
ภายในเซนเซอร์ก็จะประกอบไปด้วยวงจรอิเล็กทรอนิกส์สำหรับปรับแรงดันไฟฟ้าและสร้างสัญญาณ Pulse
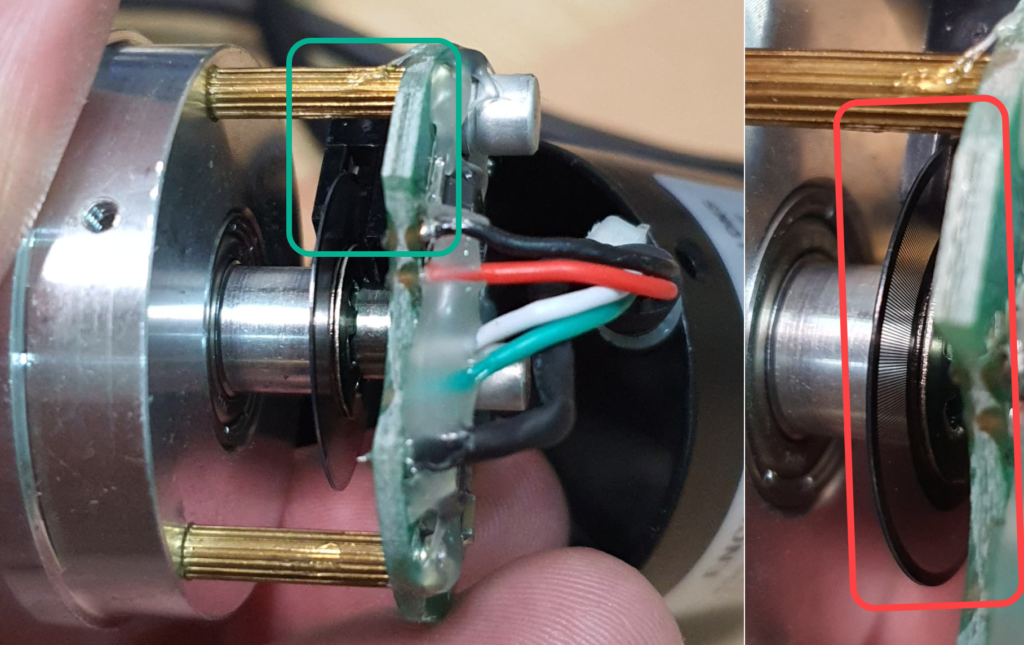
เซนเซอร์แสง(รูปด้านซ้าย) และแผ่นโลหะที่ถูกเจาะรูสำหรับสร้างสัญญาน Pulse(รูปด้านขวา) โดยจำนวนของรูจะเท่ากับจำนวน PPR
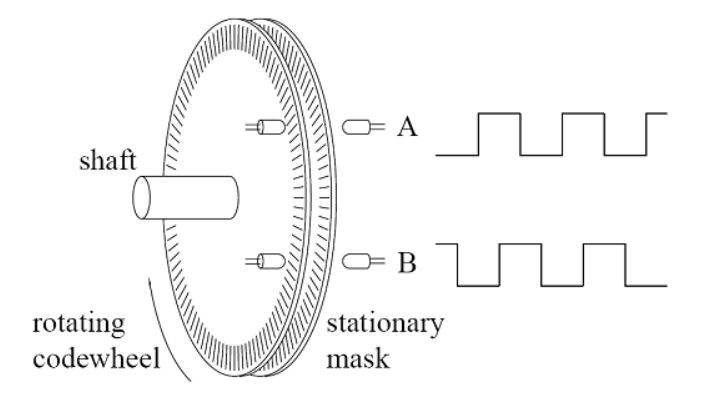
โดยเซนเซอร์แสงจะวัดแสงที่สองผ่านช่องโลหะ หากเพลาของ Encoder มีการหมุน แสงที่ตัดผ่านช่องโลหะจะทำให้เกิดสัญญาน Pulse นั้นเอง
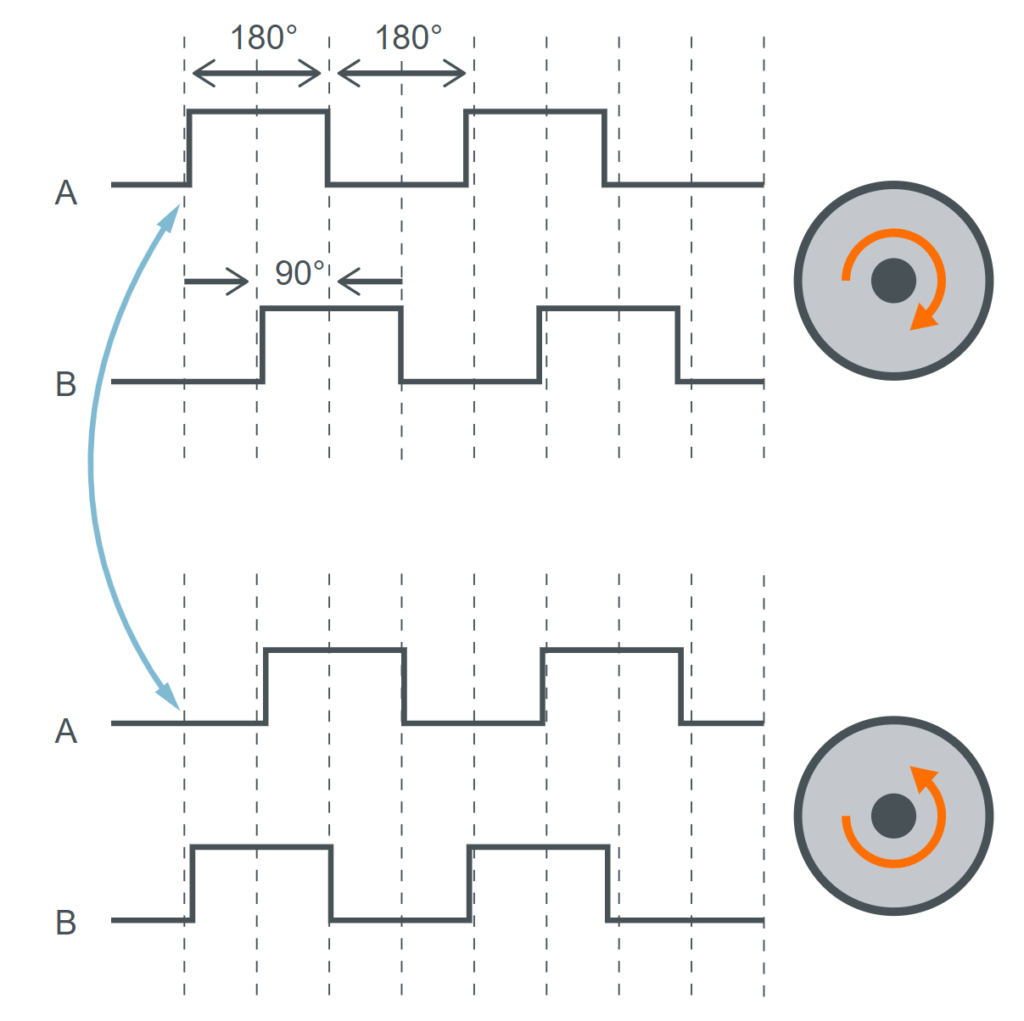
สำหรับ Encoder ทีมี 2 ช่องสัญญาน Output ตำแหน่งติดตั้งของเซนเซอร์แสงจะห่างกัน 1/2 ของความกว้างของช่องแถบโลหะ เพื่อให้ phase ของสัญญาน Output ห่างกัน 90 องศา ซึ่งการติดตั้งแบบนี้ทำให้เราสามารถทราบทิศทางของการหมุน และหากทำการอ่านค่ามุมทุกครั้งที่สัญญาณ Output มีการเปลี่ยนแปลงจะทำให้ความละเอียดของการอ่านมุมเพิ่มขึ้นเป็น 4 เท่า(quadrature mode)อีกด้วย เช่น 400 PPR จะได้ความละเอียดเท่ากับ 360/(400*4) = 0.225 องศา
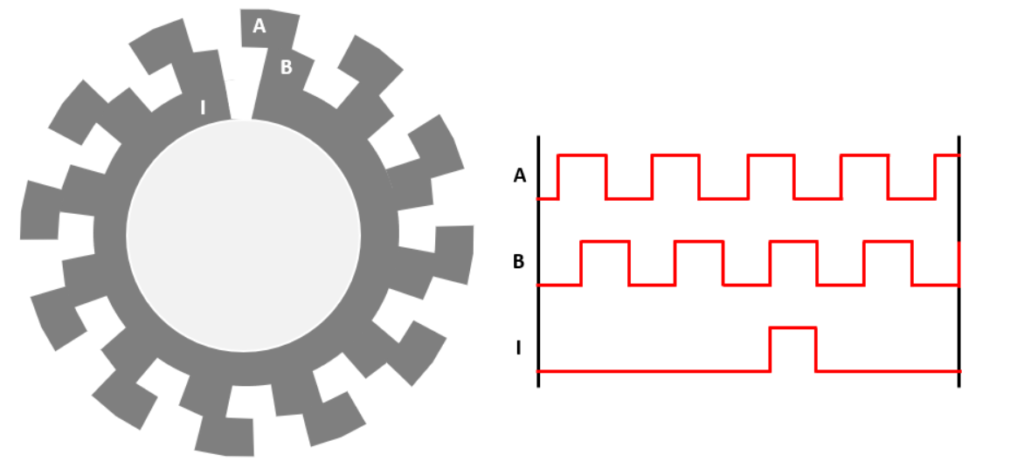
สำหรับ Encoder ทีมี 3 ช่องสัญญาน Output นอกจาก A, B และจะมี ช่องสัญญาน Z(index) ที่จะสร้าง Pulse เพียง 1 ครั้งต่อการหมุน 1 รอบ เพื่อให้ทราบ Absolute angle
Reading Position of Incremental Encoder
Arduino(328p)
โดยปรกติการค่าอ่านมุมจาก Incremental Encoder แบบ 4x ด้วย Microcontroller ประเภท Arduino(328p) เพื่อให้สามารถนับ Pulse ใด้ถูกต้องจะต้องใช้ External interrupt input มาช่วยนับค่าเมื่อสัญญาณ Output ของ Encoder มีการเปลี่ยนแปลง ดังนั้น CPU จะต้องถูก interrupt ทุกครั้งที่สัญญาณ Output ของ Encoder มีการเปลี่ยนแปลง
#define encoder0PinA 2
#define encoder0PinB 3
volatile unsigned int encoder0Pos = 0;
void setup() {
  pinMode(encoder0PinA, INPUT);
  pinMode(encoder0PinB, INPUT);
  // encoder pin on interrupt 0 (pin 2)
  attachInterrupt(0, doEncoderA, CHANGE);
  // encoder pin on interrupt 1 (pin 3)
  attachInterrupt(1, doEncoderB, CHANGE);
  Serial.begin(115200);
}

void loop(){
  //Do stuff here
  delay(10);
  Serial.println(encoder0Pos, DEC);
}

void doEncoderA(){
  // look for a low-to-high on channel A
  if (digitalRead(encoder0PinA) == HIGH)
  {
    // check channel B to see which way encoder is turning
    if (digitalRead(encoder0PinB) == LOW)
      encoder0Pos = encoder0Pos + 1; // CW
    else
      encoder0Pos = encoder0Pos - 1; // CCW
  }
  else // must be a high-to-low edge on channel A
  {
    // check channel B to see which way encoder is turning
    if (digitalRead(encoder0PinB) == HIGH)
      encoder0Pos = encoder0Pos + 1; // CW
    else
      encoder0Pos = encoder0Pos - 1; // CCW
  }
}

void doEncoderB(){
  // look for a low-to-high on channel B
  if (digitalRead(encoder0PinB) == HIGH)
  {
    // check channel A to see which way encoder is turning
    if (digitalRead(encoder0PinA) == HIGH)
      encoder0Pos = encoder0Pos + 1; // CW
    else
      encoder0Pos = encoder0Pos - 1; // CCW
  }
  else // Look for a high-to-low on channel B
  {
    // check channel B to see which way encoder is turning
    if (digitalRead(encoder0PinA) == LOW)
      encoder0Pos = encoder0Pos + 1; // CW
    else
      encoder0Pos = encoder0Pos - 1; // CCW
  }
}
STM32
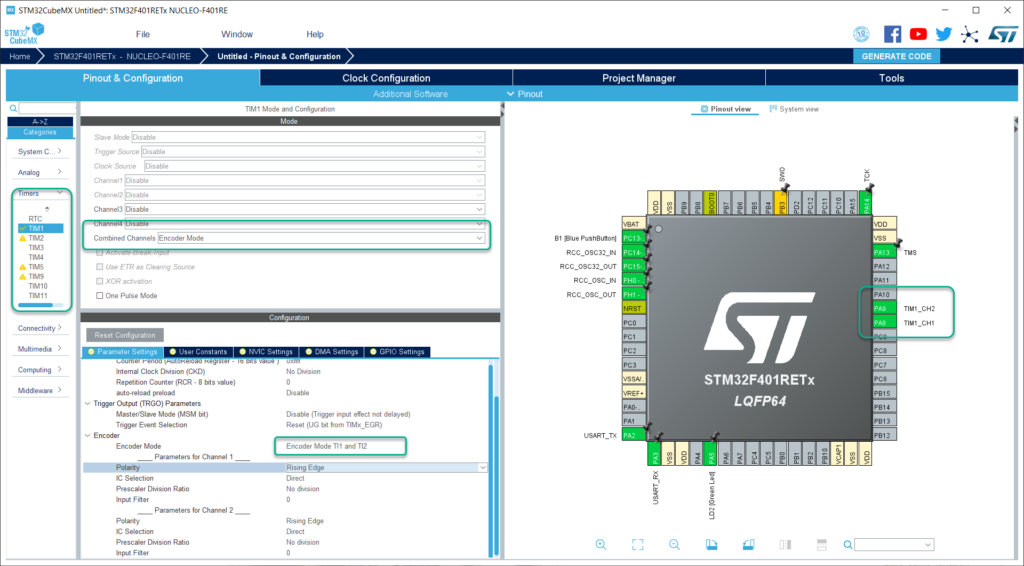
สำหรับ Microcontroller Stm32 เราสามารถใช้ Hardware Timer ช่วยอ่าน Encoder ในโหมด 4X ได้เลยโดยที่ CPU ไม่ต้อง interrupt ทุกครั้งที่สัญญาณ Output ของ Encoder มีการเปลี่ยนแปลง ก็จะทำให้การทำงานของ CPU มีประสิทธิภาพมากขึ้น
ESP32
สำหรับ ESP32 ที่เขียนด้วย Arduino เพื่อนๆอาจจะใช้ การอ่าน Encoder โดนใช้ External Interrupt Input ก็ได้ แต่ ESP32 มี Hardware Counter Module ที่ขื่อ Pulse Counter(PCNT) ที่ใช้สำหรับอ่านค่าจาก Encoder อยุ่แล้ว ทำให้ CPU ไม่ต้อง interrupt ทุกครั้งที่สัญญาณ Output ของ Encoder มีการเปลี่ยนแปลง
#include <ESP32Encoder.h>

ESP32Encoder encoder;
const int encoderA_pin = 25;
const int encoderB_pin = 26;
const int encoder_CPR = 1600;

float count_to_angle(int32_t cnt)
{
  float angle = (float)cnt * 360.0f / (float)encoder_CPR;
  return angle;
}

void setup()
{
  // put your setup code here, to run once:
  pinMode(encoderA_pin, INPUT_PULLUP);
  pinMode(encoderB_pin, INPUT_PULLUP);

  encoder.setCount(0);
  encoder.attachFullQuad(encoderA_pin, encoderB_pin);
  Serial.begin(115200);
}

void loop()
{
  // put your main code here, to run repeatedly:
  delay(10);
  // Serial.println(count_to_angle(encoder.getCount()));
  Serial.println(encoder.getCount());
}
โดนเพื่อนสามารถ download library จาก ESP32Encoder มาใช้ได้เลย เท่านี้การเขียนโปรแกรมอ่าน Encoder ก็จะมีประสิทธิภาพเพิ่มขึ้นอย่างแน่นอน…
Pingback: Parameter Identification of a DC Motor - Maker Asia